Friday, September 23, 2011

Pills Pills Pills...

So how often do you have someone come to you and say: 'I need a huge prescription pill bottle cake for a going away party"? If you're a pharmacist (or drug dealer) it's probably not an uncommon request. This is a short entry about a Pill Bottle Cake, why you should make sure your supplies are 100% fresh and how to overcome certain pain in the ass obstacles...

If you hadn't gleaned that I'm a stickler for details from my previous post, you might get it from this one. What I was asked for was a prescription pill bottle complete with script label for a Pharmacist's going away party. Seemed simple enough; split a cylinder and beef up for the cap. Non child proof - just so ya know.

Sad Disclaimer: At this point I didn't take in progress pics because I didn't have my camera (it was packed) and sometimes I just forget. 

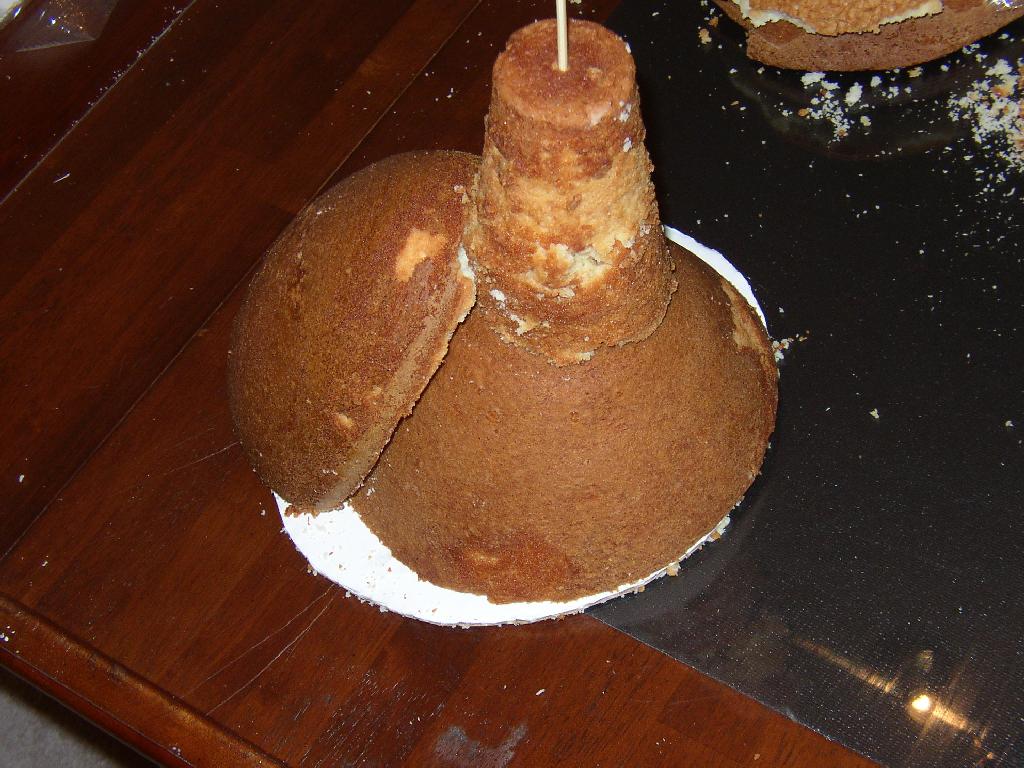
I dug out my 9" straight wall pans and made a slew (is six a slew?) of chocolate cakes, halved them and stacked them up on a board to get the right length. Then, I did one last on in a 12" spring form to get the right proportion for the cap. Sadly, yes I measured the bottle and made a ratio to follow so they were accurate. These people look at pill bottles all day - they'll know if I goof up.

Having the rough shape glued together with overkill chocolate icing (another request), I started making my 'script bottle orange' fondant which was trial and error with the third time being the charm. I'd like to pass on the color formula but it escapes me... it was a ratio of Wilton's Copper and Golden Yellow with a touch of Sunshine Yellow. Start with 60/40 of Golden to Copper and see where it gets you. (Hopefully Pill Bottle Orange - PBO from now on)

OK, rough shape is good, the orange is... orange so what did I do to make the INCREDIBLE label for the cake? Here's a hint, it's NOT printed on edible paper. It' s colored piping gel. Now, your head might have just exploded, and that's OK. I'm currently deciding if this method will be a trade secret or not, so gather your cranium and change your shorts. You might learn about it in a later post.

I dirty iced and laid the label on the cake, then filled in with the PBO and blended. Here's where I learned that extremely dry atmosphere really really REALLY likes the moisture in your foodstuffs. In the time it took me to roll out and trim, the fondant had dried enough to be less cooperative. Usually you can blend seams, uh, seamlessly, but it has to be well hydrated. This is where I consider this  particular cake a failure I couldn't blend the seams. Sure, it looked nice using the 10 foot rule but I prefer the 10 inch rule as you dive into it face first, mouth open. (Is that just me?)

In spite of my... struggles, it was very well received and I was told 'It's a cake, it doesn't HAVE to be perfect' which honestly doesn't console me much but makes me want to try harder next time. All the party goers flipped out and took lots of pictures, which reminds me - I really should try to get some of them.

I'll leave you with the lesson of making sure your supplies are as fresh as possible and be sure to compensate for atmo and altitude. Keep your fondant hydrated and in an airtight container but don't overdo it or you're gonna get a nasty surprise when you open it later. Top off your gel colors with glycerine of they're getting too pasty and try not to be so hard on yourself if it doesn't turn out perfect. It's why you're learning: Just do better next time.

So guess where the Pharmacist worked?


Yep - I had a typo. Coloradp sound like a nice place. Exacto = Eraser

They wouldn't let me use 'take rectally'... I wanted to BADLY.

It was approximately 10 x 28 I think... I really should write stuff down.

I think the Tech's Name was Jenny... also the results of drying fondant: bad seams :(
...did I say short entry somewhere up above? Congrats on making it this far.

Monday, September 5, 2011

Roulette!

Let me preface by saying I learned a valuable lesson using this blogger editor. Write your posts in something other than the online editor. Sooner or later you're going to hit a sequence of keys and your post that was 80% complete will be gone. Grrr.


My Uncle's 40th birthday was coming up and my Aunt wanted to have a surprise birthday part for him. She gave me a call and asked if I could whip something up for the party which would be casino themed. Sure - in fact I thought this would be a breeze... I went with a roulette table for its 'simplicity'. No fancy designs, no accessories (except chips) and there's bound to be a scaled down version of the wheel available. I'm no sugar craftsman *yet* so I cheated here.

First up I worked out the dimensions and made a table top for the cake. Nothing fancy just 1/2" MDF, some espresso brown paint and a LOT of lacquer.
believe it or not it looked worse when I got it...

I know it look dirty. Another hobby at the time was fixing up a foreclosure whilst living in it. I recommend against it, especially if you're married and want to continue to be so. I was single at the time and the mess and expense even got to me... but that's another story - a hilarious, sad sad creepy story. *cough* So, anyway, I made sure the table was clean, and washed it so no one had the taste of sawdust and fondant.

Got the table made and then worked out my numbering scheme. I found a set of oval clay cutters (TIP: clay tools can be cheaper than 'fondant tools' and sometimes better) and cut out my ovals. Next I experimented with numbering them. My lettering still isn't great (to this day) and I wanted numbers to match. Snagged an alphanumeric cutter kit and made it work. First I tried just making impressions in the ovals and painting in with icing. Looked like crap not to mention taking forever. See below:
This just isn't worth it...ZZZZzzzz... I'm lookin @ YOU James!


I replaced the fouled ovals and re-stamped them thusly:


Next, I rolled out some white and stamped out a complete set of numbers and glued them with a little water. Maybe next time I'll punch out the numbers and fill it with royal icing to have a level oval.


I either forgot or lost the pics in the next segments so dust off your imagination... while the ovals were drying; I mixed up some casino green. This was the most tedious part, if the color's not right I'm not happy.   
*Just ask my mom about my Superman costume when I was 6... Actually don't. It leads to other embarrassing stories I'd rather be forgotten.
           
Jeez. A.D.D. much? Ok, so it took a while to get a suitable green. Lots of green and some random amount of yellow to Kelly it up. Remember, it dries a little darker just like wall paint so go a slight shade lighter if color is critical or you're an anal nut job like me.

For the border I used chocolate fondant. For you Tootsie Roll fans, all you need is a tub of this 'cause it's the same thing. Yeah, I ate a lot in the name of Quality Control. It's chef’s privilege!

I rolled it out about 1/4" thick and used the ol' pizza cutter and an aluminum yardstick. Choco Fondant doesn't smooth and hide seams as easily as the regular stuff, so keep that in mind when you intent to use it.

I put the cake on he board and got it iced to take fondant. Another tip is to go to Harbor Freight and get a few sets of plastic spreaders (Like for Bondo). Doing this with an icing spatula was a pain.


Fast forward, past wrapping the chocolate wood trim and laying the green on the cake. I PROMISE I'll be better at taking photos someday. I needed to lay out the grid for the numbers. A little math and some trial and error (my math sucks) and I came out with this grid template. You'll also see that I found my toy roulette wheel which was just right. I'm pretty sure it was from a local, short-lived game store in the mall. Honestly, I can't remember.
No, the Elmer’s and tacky glue were not used in the assembly.

I poked holes in the corners to have a guide when laying down the icing lines and placed the numbered ovals in the grid.
#10: elusive, invisible... DELICIOUS

Here's where it becomes obvious I need an assistant with penmanship. I cut out a black & red rectangle for the sideline and added the barely legible odds and such to the outside. I really need to figure out how to not have to write things on cakes. Also not the troubling seams on the wood trim.
*shakes fist at chocolate fondant* Shakes fist at self for sloppy writing.

Finished shot. All in all I know that the next one will be better, having ideas on how to not have to write things with my hands. I also think I'll be attempting to countersink ovals and numbers, etc for a less ‘stacky’ look. Not bad for #2 though. It tasted good and, if I recall, the liquor cabinet suffered heavy casualties so I'd call it a successful party.

Wonder what's next...


Monday, August 15, 2011

The Infamous Dolphin Cake

OK. Say you're sitting at a bar and you look across and see me sitting there. Chances are you're not going to assume that one of my hobbies is making sculptured cakes. Actually, I dunno what you'd think because I don't remember ever asking someone. This was all an accident, really, like my main career. It was something I just tried because 'it couldn't be that hard'. I was half right.

I'm not leading off here with my first piece. I'm doing you a favor. This is my most famous one. It was a going away party for a co-worker/friend of mine back at a previous employer in August of 2007. She liked Dolphins, I was looking to prove myself a little in the cake arena and it seemed like a good opportunity. I dug out some cake pans and make my building blocks, printed some reference pics off the internet, turned on some Hearts of Space and went to work. At this point I still took pictures of me actually 'Making & Baking' mostly just to have proof I did it. I don't bother now - if they don't believe, then they just can't have any :P

Here's a set of pictures. By the way - this is the very first time I sculpted and used fondant on a cake. Ever. Turned out pretty well. The head is life-sized (to a Dolphin) and it felt like the whole deal weighed in over 25 lbs including the half sheet. I hear she still has the head in her freezer...


Above pics are of initial rough assembly.
I was trying to get the feel of a Dolphin head.


The dirty icing / fondant glue with a gum paste schnozz.


Laying the fondant and sculpting in the details. 
I remember grinning incessantly at the smirk it has. 
I guess artists* DO put a little of themselves in their creations.
*term artist used loosely


Airbrushing the petal dust. 
Finally got to use the bottle of Everclear.

Placed on the sheet. 
Used a cookie cutter to make the little ones on the sides.


Lettering is hand-painted. 
My least favorite task.

So there you have it.
To this day the wording irks me a little, but that's what was ordered.
I'm sure someone will Grammar-bomb me for it.